OpenLLM in Action Part 2: Deploying Llama 2 13B on BentoCloud
Authors

Last Updated
Share

⚠️ Outdated content#
Note: The content in this blog post is not applicable any more. Please see the OpenLLM readme to learn more information about OpenLLM.
This is Part 2 of our comprehensive blog series on OpenLLM. The initial installment delves into the challenges of LLM deployment and the OpenLLM fundamentals with a simple quickstart. This second post dives deeper by providing a practical example of deploying an LLM in production using OpenLLM and BentoCloud.
BentoCloud is a serverless platform specifically designed for deploying AI applications in production with great scalability and flexibility. I have already explained why BentoCloud stands out as the platform of choice for heavyweights like Llama 2 in my article Deploying Llama 2 7B on BentoCloud, so I will bypass a recap to delve directly into the heart of the matter - deploying Llama 2 13B with OpenLLM and BentoCloud.
Before you begin#
Make sure you meet the following prerequisites.
- OpenLLM installed. See the Part 1 blog post to learn more.
- A BentoCloud account. BentoCloud is still open for sign-ups and we are progressively granting access.
- Access to the official Llama 2 13B model. This involves visiting the Meta AI website to accept its licensing terms and gaining access to Llama 2 models on Hugging Face. However, if you're unable to access the official model, any Llama 2 variant can be deployed using OpenLLM. Explore more Llama 2 compatible models on the Hugging Face Model Hub.
Building a Bento#
As mentioned in the previous blog post, Bentos are the unified distribution unit in BentoML. To deploy the model on BentoCloud, you need to package it into a Bento and push it to BentoCloud.
-
Log in to Hugging Face. Since OpenLLM sources the Llama 2 model from Hugging Face, logging in is essential.
pip install -U huggingface_hub huggingface-cli login -
Log in to BentoCloud. This requires you to have a Developer API token, which allows you to access BentoCloud and manage different cloud resources. Upon generating this token, a pop-up should appear, displaying the following login command.
bentoml cloud login --api-token <your-api-token> --endpoint <your-bentocloud-endpoint>Note: After you log in, you can create and manage Bento Deployments directly with commands like
bentoml deployment create/update. See the BentoML documentation to learn more. -
Build a Bento for the Llama 2 13B model and upload it directly to BentoCloud by adding the
--pushoption. For demonstration purposes, I use meta-llama/Llama-2-13b-chat-hf as an example, but feel free to choose any other 13B or Llama 2 variant.openllm build meta-llama/Llama-2-13b-chat-hf --pushThe above command, if the model isn’t already stored locally, fetches it from Hugging Face. Once downloaded, it can be verified using
bentoml models list.$ bentoml models list Tag Module Size Creation Time pt-meta-llama--llama-2-13b-chat-hf:0ba94ac9b9e1d5a0037780667e8b219adde1908c openllm.serialisation.transformers 24.25 GiB 2023-09-20 06:31:50 -
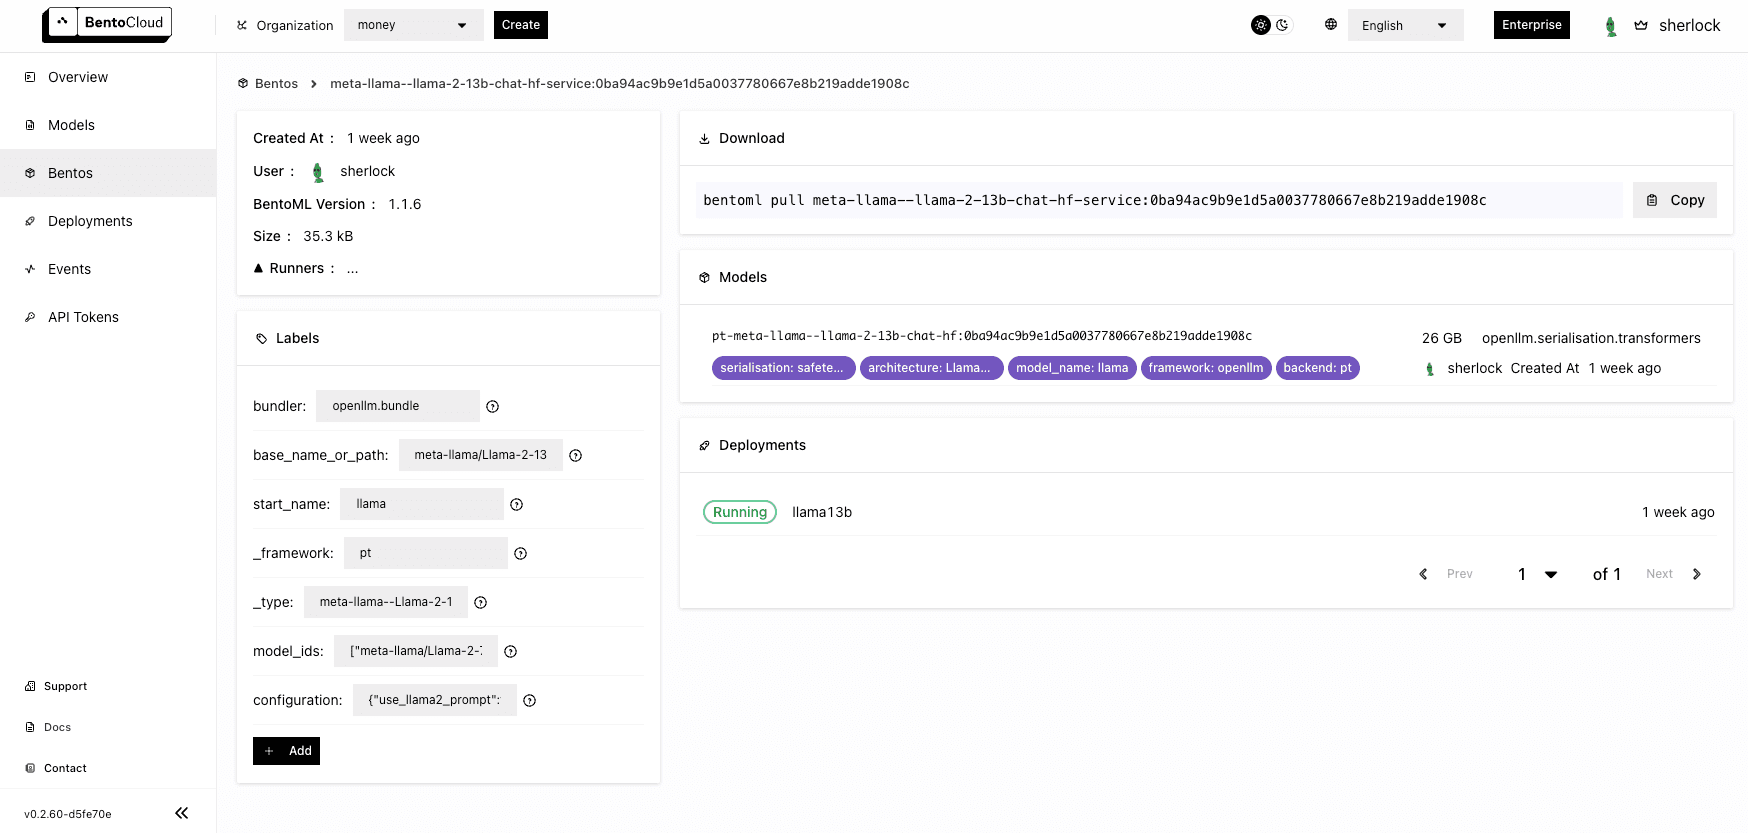
When the entire process is done, you can find the Bento on the Bento Repositories page. On BentoCloud, each Bento Repository stands for a group of Bentos - same name, different versions. Navigate to the Bento details page for a closer look.
Deploying Llama 2 13B#
Now that the Bento is on BentoCloud, let's deploy it.
-
Go to the Deployments page and click Create. On BentoCloud, you have two Deployment options - Online Service and On-Demand Function. For this example, choose the latter, ideal for large inference requests and situations where immediate responses aren't critical.
-
Set up your Bento Deployment on one of the three tabs.
- Basic: Quickly spin up a Deployment with basic settings.
- Advanced: Configure additional configurations of the Deployment, such as autoscaling behaviors, environment variables, and update strategies.
- JSON: Define a JSON file to configure the Deployment directly.
-
Select the Advanced tab and specify the required fields. Pay attention to the following fields:
- Endpoint Access Type: This property controls how the Llama 2 application can be accessed. Public means no access restrictions. In production, I recommend you select Protected to make your application accessible only to those with a valid User token.
- Bento Repository: Select the Bento you just uploaded to BentoCloud.
- Resources per replica: You can run API Servers and Runners on different machines. I chose
cpu.xlargefor API Servers andgpu.t4.12xlargefor Runners. - BentoML Configuration: Specify additional BentoML configurations to customize the behavior of your Deployment. If you also select
gpu.t4.12xlarge, addrunners."llm-llama-runner".workers_per_resource=0.25in this field.
For more information about properties on this page, see Deployment creation and update information.
-
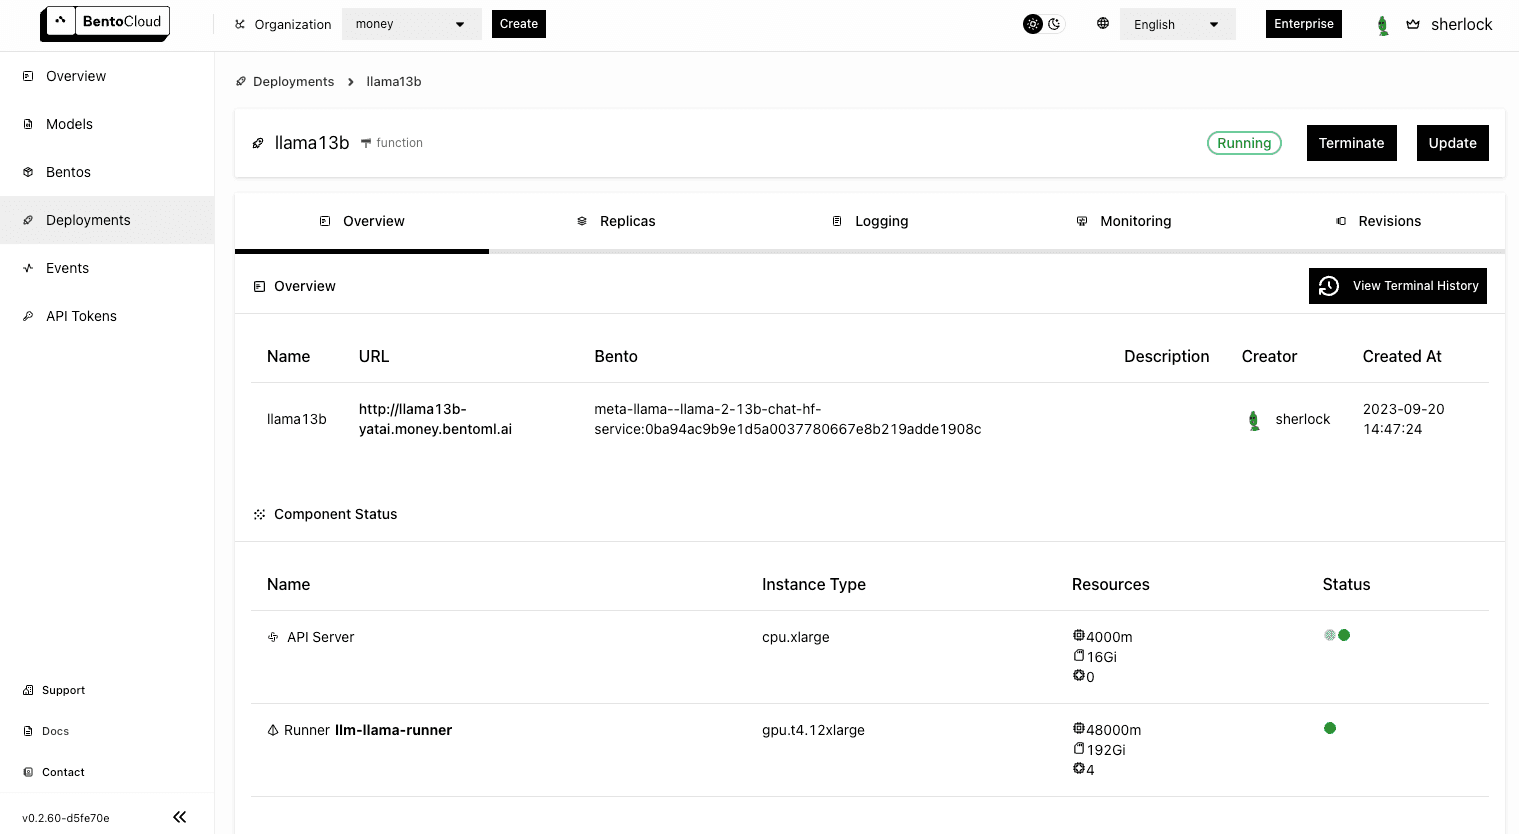
Click Submit. When the Deployment is ready, both the API Server and Runner Pods should be active.
Interacting with the application#
With the Llama 2 13B application up and running, it's time to access it through the URL exposed.
-
On the Overview tab of its details page, click the link under URL. If you do not set any access control policy, you should be able to access the link directly.
-
In the Service APIs section, select the
generateAPI and click Try it out. Enter your prompt and click Execute. You can find the answer in the Responses section. Alternatively, use thecurlcommand, also presented within the Responses section, to send your queries.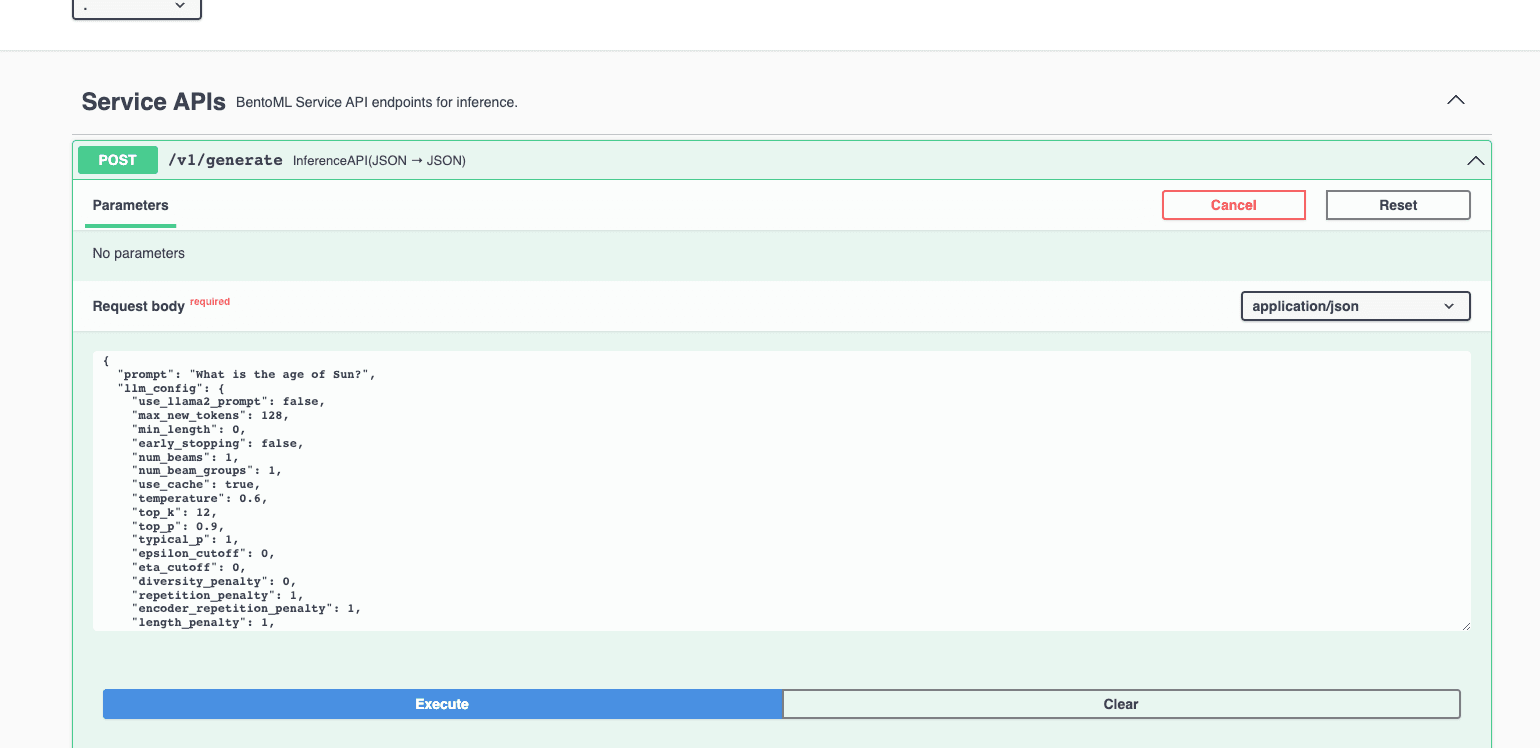
-
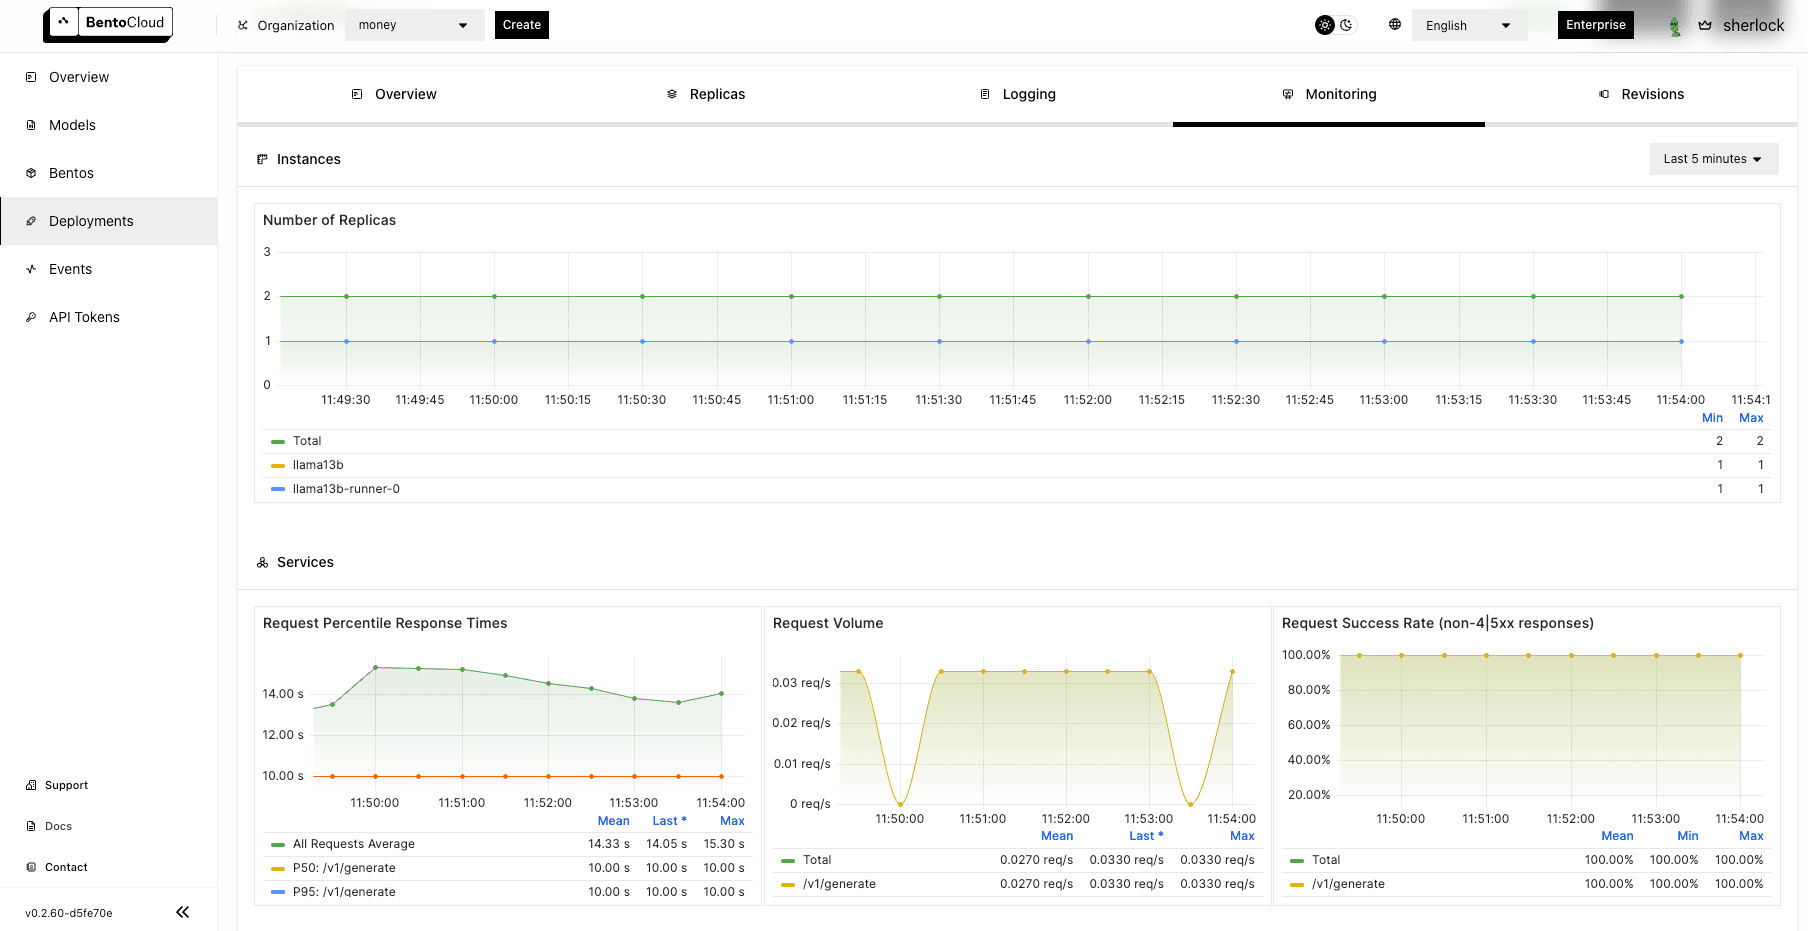
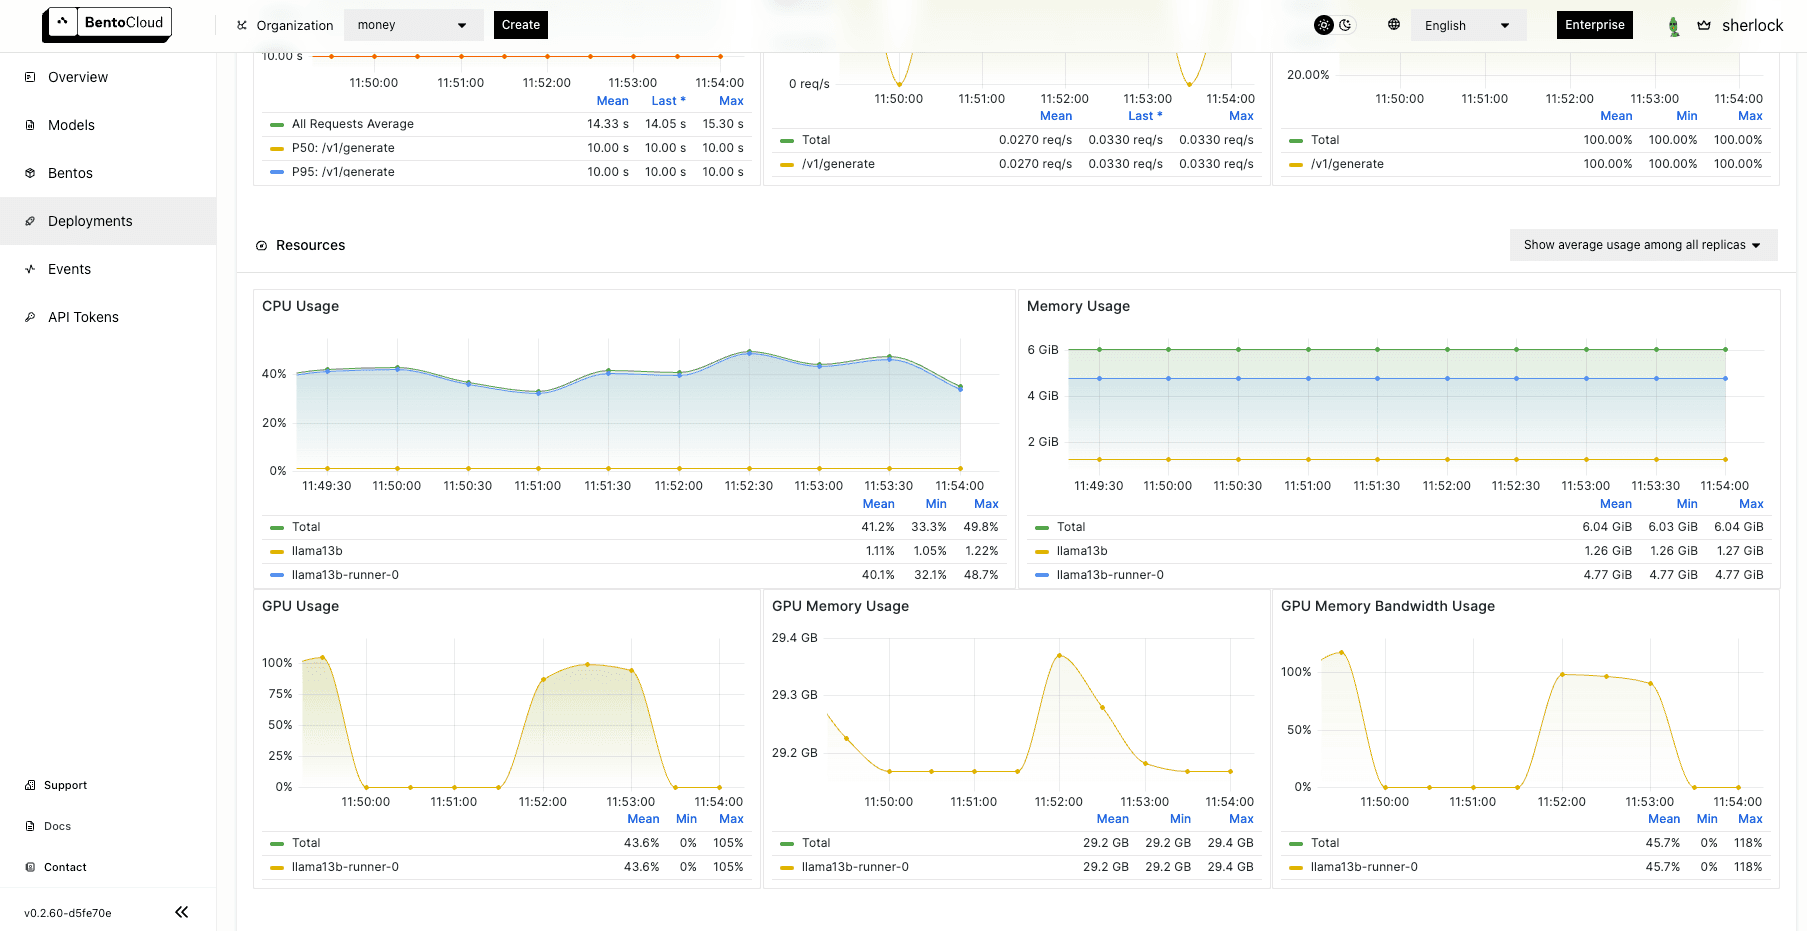
On the Monitoring tab, you can view different metrics of the workloads:
Conclusion#
As we wrap up this post, it's essential to note that this is only the tip of the iceberg when it comes to the potential of OpenLLM. I encourage you to experiment with more models and share your experience with us! Stay tuned for the next post, in which I will talk more about OpenLLM’s integrations with other tools.
Happy coding ⌨️!
More on BentoML and OpenLLM#
To learn more about BentoML, OpenLLM, and other ecosystem tools, check out the following resources:
- [Blog] OpenLLM in Action Part 1: Understanding the Basics of OpenLLM
- [Blog] BYOC to BentoCloud: Privacy, Flexibility, and Cost Efficiency in One Package
- [Blog] Deploying an OCR Model with EasyOCR and BentoML
- Don’t miss out on the chance to be an early adopter! BentoCloud is still open for early sign-ups. Experience a serverless platform tailored to simplify the building and management of your AI applications, ensuring both ease of use and scalability.